
ZenaDrone Homepage

How to Choose the Right Terminal Block?

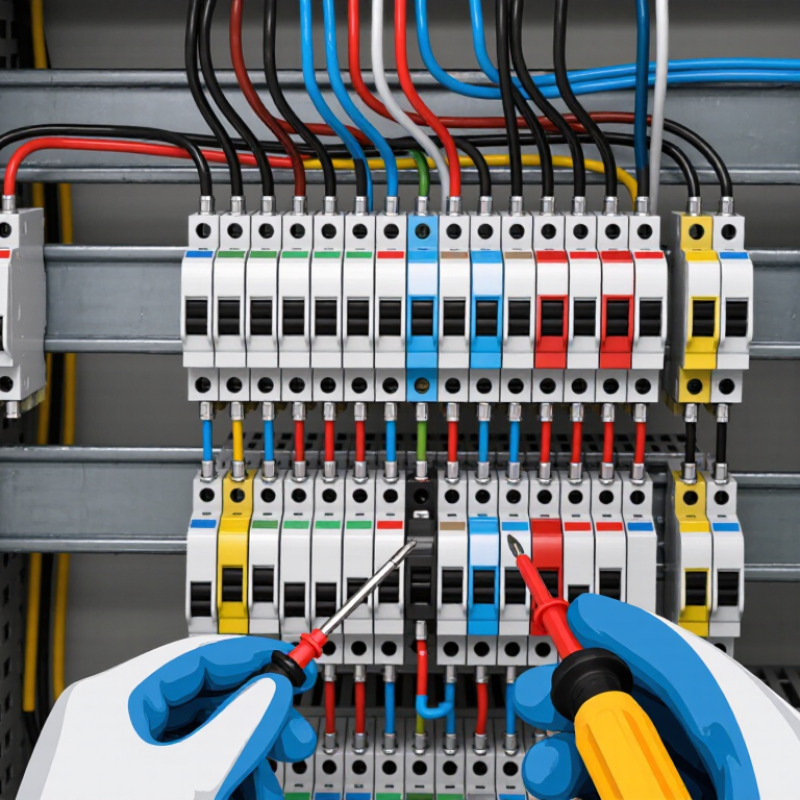
Choosing the right Terminal Block is a small decision with large consequences. A loose connection can create heat, vibration damage, intermittent signals, or expensive downtime. Inside a control cabinet, the choice becomes visible: wire size, ferrule fit, label space, and the pressure of each clamping point all matter.

MarketsandMarkets reports that the global terminal block market is projected to grow from approximately USD 3.4 billion in 2023 to USD 5.1 billion by 2028. Grand View Research also identifies industrial automation, transportation, and energy systems as major demand areas. These figures show strong growth, but they do not make selection easier. More products can mean more mistakes.

Electrical educator Mike Holt has repeatedly emphasized a practical principle: “A connection is only as good as its weakest point.” That warning applies directly to Terminal Block selection. Engineers should verify rated voltage, current capacity, conductor range, insulation material, temperature limits, and short-circuit performance. IEC 60947-7-1 and UL 1059 provide useful reference points, but certification alone does not guarantee suitability for every installation.

A DIN-rail block may fit perfectly in the cabinet and still fail the application. Perhaps the wire bends too sharply. Perhaps the enclosure reaches 70°C. Perhaps maintenance staff cannot read the markings. These details are easy to overlook. They should not be.

The right choice balances electrical performance, mechanical reliability, installation speed, and future maintenance. A cheaper part may save cents today. It may cost hours tomorrow. Industry reports offer direction, but careful application review remains essential.
How to Choose the Right Terminal Block?

Define the Electrical and Mechanical Requirements

How to Choose the Right Terminal Block?

Define the Electrical and Mechanical Requirements

Choosing a terminal block starts with its electrical duty. Record the circuit voltage, continuous current, and expected short-term surge. Do not size it from normal readings alone. Motors, heaters, and switching loads can create extra stress. Check the rated wire range and temperature rating together. A terminal block carrying 20 amps in a cool cabinet may need derating inside a hot enclosure. In field work, I also verify the conductor material and insulation type before selecting a connection system. These details affect contact heating and long-term reliability.

Mechanical requirements deserve equal attention. Confirm the wire cross-section, entry direction, mounting method, and available panel space. Measure the enclosure before ordering. Small details matter. Vibration may loosen a poorly secured conductor, while repeated maintenance can damage a weak clamp. Choose suitable spacing for insulation, tools, and safe access. Consider labeling, finger protection, corrosion resistance, and the required tightening torque. A compact design can save space, but it may make inspection and servicing harder.

Testing should reflect real installation conditions. Build a sample assembly, apply the expected load, and inspect temperature rise after several hours. Use a calibrated torque tool and perform a gentle pull test on each wire. I once focused too heavily on current capacity and overlooked access for a screwdriver. That shortcut was inconvenient. More importantly, it slowed maintenance and encouraged rushed work. Review the selection with the installer, not only the designer. Their practical feedback often exposes requirements missing from the original drawing.

Compare Terminal Block Types and Connection Methods

How to Choose the Right Terminal Block?

Compare Terminal Block Types and Connection Methods

A terminal block should match the wire, current, environment, and maintenance plan. Feed-through blocks suit simple point-to-point wiring. Grounding blocks connect protective conductors to the mounting rail. Barrier blocks add separation where exposed terminals need extra protection. Modular blocks also make circuit changes easier inside crowded control cabinets.

Connection method affects daily reliability. Screw-clamp terminals provide strong contact when tightened to the correct torque. They are practical for larger wires, but loose screws can create heat and voltage loss. Spring-clamp terminals resist vibration and usually need less maintenance. Push-in terminals speed installation, especially with solid or ferruled conductors. However, removal may require a tool. Check the permitted wire size, conductor type, stripping length, and rated current before installation. Never choose by appearance alone.

Tips: Mark every circuit clearly, and leave enough space for a test probe. Pull gently on each wire after connection. A small labeling error can delay fault finding for hours. In my experience, vibration, repeated maintenance, and limited cabinet space often matter more than the initial purchase price. I have also seen compact terminals selected for neatness, then rejected because the wire bend radius was too tight. That mistake is easy to make. Review the layout with the actual wire before ordering. When safety is critical, verify the design against applicable electrical standards and the equipment manufacturer’s instructions.

How to Choose the Right Terminal Block?

Comparison of common terminal block connection methods by typical conductor cross-section

Screw and barrier terminal blocks commonly support larger conductor sizes, while spring-clamp and push-in designs provide faster installation and reliable vibration resistance. Actual wire ranges depend on the terminal block design, conductor type, and applicable standards, so always verify the manufacturer’s technical specification before selection.

Check Compatibility With Wire, Voltage, and Current Ratings

How to Choose the Right Terminal Block?
Check Compatibility With Wire, Voltage, and Current Ratings

A terminal block must match the conductor mechanically and electrically. During panel work, I check wire size, strand type, insulation diameter, and entry direction. The wire must fit securely. A 2.5 mm² terminal may accept one conductor but reject two. Ferrules can improve strand control, but they also need extra opening space. Do not assume a familiar screw clamp fits every flexible wire. IEC 60947-7-1:2020 defines terminal-block requirements and verification tests, including temperature-rise performance.

Current ratings need real calculations. NFPA 70, 2023 Edition, Table 310.16, lists 12 AWG copper conductors at 20 amperes under stated 60°C conditions. That figure is not a universal terminal-block rating. Ambient heat, conductor grouping, insulation type, and enclosure size can reduce allowable current. Choose a block rated at or above the circuit’s adjusted ampacity. Leave practical margin. Tight panels often run warmer than drawings suggest.

Voltage selection requires more than reading one number. Check working voltage, insulation category, clearance, creepage, and pollution conditions. IEC 60664-1 applies these insulation-coordination principles. A compact block may pass a bench test yet fail in a contaminated installation. Review short-circuit withstand, tightening torque, and test conditions. I once trusted the printed rating alone. That was too simple. Verify the complete assembly, especially when combining different wire sizes or accessories.

Evaluate Installation Conditions and Safety Features

How to Choose the Right Terminal Block?

Evaluate the installation environment before comparing terminal block designs. Measure the available panel space, wire entry direction, and required mounting clearance. A crowded enclosure can make routine inspection surprisingly difficult.

Check ambient temperature, humidity, dust, and chemical exposure around the equipment. Outdoor cabinets may need stronger protection against moisture and corrosion. In areas with vibration, choose secure clamping and a stable mounting method.

Match the terminal block’s voltage and current ratings to the actual circuit, not just its normal load. Consider temporary overloads during motor startup. Confirm the accepted conductor size, insulation diameter, and tightening torque.

A poorly fitted wire can loosen gradually and create heat. Touch-proof covers and finger-safe designs reduce accidental contact with live parts. Flame-resistant materials also deserve attention near heat-producing equipment.

Safety markings should be clear and durable. Look for identification areas that remain readable after wiring and maintenance. Check whether the design supports test points, bridging, grounding, or circuit separation when required.

Verify applicable standards and local electrical rules before installation.

I have seen selection decisions focus too heavily on price and enclosure size. That approach can overlook maintenance risks. A small terminal block may fit perfectly, yet fail under vibration or thermal stress.

Leave practical space for a screwdriver, inspection, and future rewiring.

Select the Best Terminal Block for Long-Term Maintenance

How to Choose the Right Terminal Block?

Select the Best Terminal Block for Long-Term Maintenance

A terminal block should remain easy to inspect after years of heat, dust, and vibration. Start with the conductor size, rated current, voltage, and insulation temperature. Then check the actual operating conditions, not only the catalog values. A block near a motor may need stronger vibration resistance than one inside a quiet control cabinet. Spring connections can reduce retightening work, while screw connections allow familiar visual checks. The better option depends on your maintenance routine.

During site inspections, I look for clear markings, accessible test points, and replaceable accessories. A transparent cover can reveal loose strands or discoloration before failure occurs. Choose a design that supports jumpers, end stops, and partitions without complicated tools. Confirm the required creepage and clearance distances against applicable electrical standards. Also review the torque range and conductor preparation instructions. Small details often decide whether maintenance takes five minutes or half a shift.

Do not select the narrowest block simply to save cabinet space. Crowded wiring makes troubleshooting slower and increases handling errors. I once saw a compact installation become difficult to service because labels could not be read after wiring. That choice seemed efficient at first. It was not. Leave room for a screwdriver, inspection light, and future circuit changes. Recheck the selection after considering moisture, temperature cycling, and the skills of the maintenance team. A technically suitable block may still be a poor long-term choice if technicians cannot work with it confidently.

Scroll to Top