



How to Choose the Best Video Drone for Your Needs?
Choosing a video drone is less about buying the most expensive aircraft and more about matching its camera and handling to the footage you need. A traveler filming mountain trails may value a lightweight, foldable model. A small business owner may need dependable color, stable hovering, and repeatable shots. These needs differ. So do budgets.
Compare camera resolution with sensor size, lens options, stabilization, and low-light performance. High resolution sounds impressive, but it cannot fix soft focus or shaky footage. Check flight time, too. Advertised figures are usually best-case estimates, not promises for windy days. A spare battery may matter more than one extra camera feature. Not glamorous, but useful. Beginners often benefit from clear controls, obstacle sensing, and a companion app with accessible settings. Experienced creators may prefer manual exposure and precise movement. Still, features vary by model and firmware, so verify them in current manufacturer specifications and independent tests. A spec sheet can mislead.
Think about where you plan to fly and how you will carry the equipment. Check local rules and respect people’s privacy before each trip. Avoid unsafe weather and crowded areas. There is no perfect pick. The right video drone balances image quality, reliability, ease of use, and real-world cost. Even careful planning cannot guarantee cinematic footage every time. That is worth remembering.
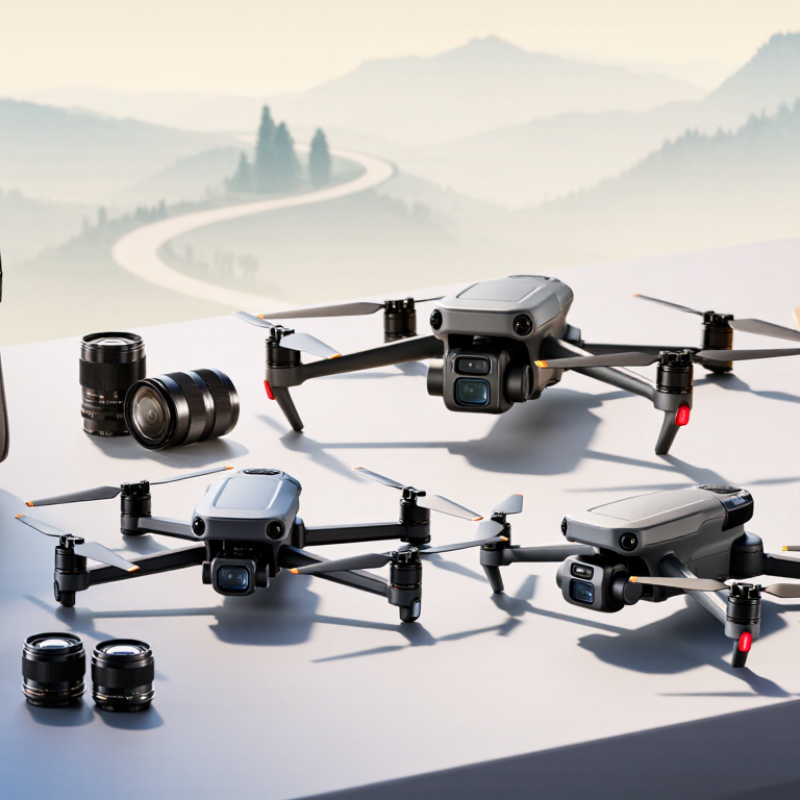
Identify Your Video Recording Needs and Flight Environment
Decide what the footage must show before comparing cameras. A child running across a field needs reliable tracking and stabilization; a quiet sunset may need better low-light performance. For moving subjects, check frame rates and whether the camera can hold detail during fast turns. Resolution alone is not the whole story.
Your flight environment shapes the choice just as much. NOAA’s 1991–2020 U.S. Climate Normals summarize 30-year local weather patterns. Use them to compare seasonal wind and precipitation near your regular launch sites. NOAA’s Beaufort Wind Scale classifies 13–18 mph as a moderate breeze, when small branches move and loose dust rises. Even a capable camera cannot rescue shaky footage in gusty conditions. Check the aircraft’s stated wind limit, too. Not glamorous, but useful.
Think through the actual route: trees, shoreline spray, shaded paths, or a cramped launch area all change what feels manageable. I would still be tempted by a long advertised flight time, but compare it with the minutes you can safely use in your typical conditions. A spare battery helps; it does not fix poor light or a gusty location. I’d also check whether the controls feel clear while wearing gloves. That small detail is easy to overlook.
How to Choose the Best Video Drone for Your Needs? — Identify Your Video Recording Needs and Flight Environment
| Recording Need or Environment | Useful Camera and Video Features | Flight Requirements | Practical Considerations |
|---|---|---|---|
| Travel and everyday footage | 4K recording, a stabilized camera, and adjustable frame rates provide flexibility for general-purpose clips. | Compact folded size and a moderate flight time help when traveling between locations. | Check the packed weight, spare-battery availability, local flight rules, and whether the camera can capture the desired vertical format. |
| Smooth cinematic shots | A mechanical gimbal, reliable exposure controls, and a larger image sensor can help produce smoother footage and improve low-light results. | Stable hovering, precise low-speed control, and dependable positioning are useful for planned camera moves. | Wind can affect smoothness even when the camera is stabilized. Allow time to plan routes and repeat takes safely. |
| Social media and vertical video | Look for a camera or gimbal that supports portrait framing, plus common recording formats compatible with your editing workflow. | Responsive controls and reliable subject tracking can help with short, moving shots. | Confirm whether portrait capture is native or created by cropping; cropping reduces the usable image area. |
| Action and moving subjects | Higher frame-rate options, continuous autofocus where available, and dependable subject-tracking features may be useful. | Good control response, obstacle-sensing coverage, and a clear view of the flight path are important. | Obstacle sensors have operating limits and may work less effectively in dim light, over water, or around thin objects. Do not rely on them as a substitute for piloting. |
| Low-light or evening filming | A larger sensor and manual exposure settings can offer more control in dim conditions; test noise and focus performance before relying on a setup. | Stable hovering and careful positioning help reduce unwanted movement in the footage. | Low light can also reduce visibility and affect some sensing systems. Follow applicable night-flight rules and maintain the required visual awareness. |
| Open, windy locations | Effective stabilization and adjustable shutter settings help manage movement, but cannot eliminate all wind-related motion. | Choose a drone whose stated operating conditions suit the location, and leave a safety margin for gusts. | Manufacturer wind limits are not a guarantee of smooth footage. Avoid flights when conditions exceed the aircraft or pilot’s safe operating limits. |
| Forests, streets, or confined areas | A wide camera view can help frame shots, while adjustable camera tilt supports different compositions. | Compact size and predictable low-speed handling can be helpful, but adequate clearance is essential. | Buildings, trees, wires, and signal obstructions increase risk. Check the route in advance and avoid flying beyond a safe, legal operating area. |
| Long sessions or remote locations | Consistent recording settings and sufficient storage capacity help keep footage organized across multiple flights. | Compare realistic usable flight time, battery charging options, and the number of batteries needed for the planned shoot. | Advertised maximum flight time is measured under specified test conditions; wind, temperature, maneuvering, and battery age can reduce actual time aloft. |
| Water, snow, or dusty sites | Image stabilization and suitable exposure control help with bright reflections and changing light. | Prioritize a safe launch and landing area and keep the aircraft within a recoverable distance. | Many consumer drones are not waterproof or dustproof. Reflections, low contrast, and featureless surfaces can also affect visual positioning systems. |
Selection tip: Start with the footage you need, then match camera capabilities, controllability, and environmental limits to the locations where you will fly. Check current local aviation and privacy requirements before each flight.
Related Posts
-
How to Choose the Best Flying Camera Drone?
-
2026 Top Flying Camera Drone Trends You Need to Know?
-

Top Benefits of Using Professional Drones for Your Business?
-
How to Choose the Best Search and Rescue Drone for Your Needs?
-

What is a DIY Drone and How to Build One Step by Step Guide
-
2026 How to Use a Construction Drone for Efficient Building Projects?